How to Prevent Candle Tunneling: A Complete First-Burn Guide for Large Jar Candles
A beautiful jar candle should burn evenly, release fragrance consistently, and give you hours of cozy light. But if the flame melts only a narrow circle around the wick, leaving a wall of hard wax around the edge, you are dealing with candle tunneling. It is one of the most common candle-care problems—and one of the easiest to prevent when you know what to do.
This guide explains how to prevent candle tunneling in large jar candles, why the first burn matters so much, how long to burn a candle, and what to do if a tunnel has already formed. Whether you are lighting a new fall fragrance or a familiar year-round favorite, a few simple habits can help you enjoy a cleaner, more even burn.
What Is Candle Tunneling?
Candle tunneling happens when the wax melts straight down the center of the jar instead of reaching toward the sides. As the candle continues to burn, the center gets deeper while a thick ring of unused wax remains around the inside edge of the vessel. The wick can eventually sit too low to receive enough oxygen, leading to a small flame, weak fragrance, or a candle that becomes difficult to keep lit.
Tunneling is not simply a cosmetic issue. The unmelted wax contains fragrance and potential burn time. Preventing that wax from being stranded helps you get more enjoyment from the candle you chose.
Why Do Jar Candles Tunnel?
The most frequent cause is an initial burn that ends before the melt pool has had time to widen. Wax has a kind of “burn memory”: the melt pattern established during the early burns can influence how the candle behaves later. If only the center liquefies during the first lighting, that narrow pool may become the path of least resistance on future burns.
Other possible causes include placing the candle in a draft, trimming the wick too short, burning for repeated short sessions, or allowing soot and wick debris to collect in the wax. A jar candle also needs enough uninterrupted time for heat to travel across its wider surface. That is why large candles often benefit from a little more patience than small candles.
The First-Burn Rule: Let the Melt Pool Develop
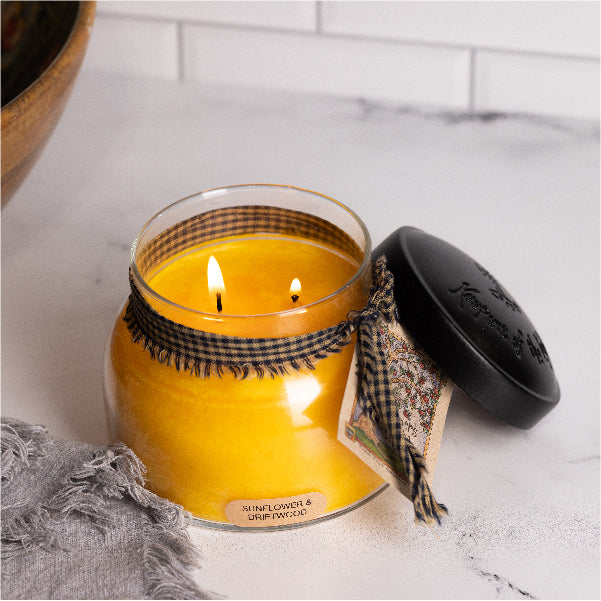
The most important step is simple: on the first burn, allow the wax to melt broadly across the surface before extinguishing the candle. Aim for a melt pool that approaches the edge of the jar. It does not need to be perfectly deep or identical at every point, but it should be wide and even.
A useful general estimate is about one hour of burn time for each inch of candle diameter, while always following the specific safety and burn instructions on the product label. Because wax, wick design, room temperature, and fragrance formula can affect timing, use the melt pool as your visual cue instead of relying only on the clock.
Plan that first lighting for a relaxed evening rather than a short window before leaving home. Never leave a burning candle unattended, and do not extend a burn beyond the maximum time listed on its warning label just to force wax to melt.
How to Prevent Candle Tunneling Step by Step
1. Start with a properly trimmed wick
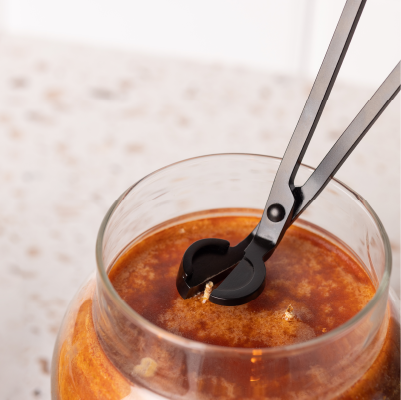
Before every burn, check the wick. Remove the curled, charred “mushroom” at the top and trim according to the candle’s label instructions—commonly around 1/4 inch. A wick that is too long may create a large, smoky flame; a wick cut far too short may struggle to melt the wax evenly. Use a wick trimmer or small scissors, and remove every clipping from the jar before lighting.
2. Choose a calm, level location
Set the candle on a stable, heat-resistant surface away from open windows, ceiling fans, air vents, and busy walkways. Moving air can push the flame to one side, creating uneven heat and an off-center melt pool. A level surface helps the liquid wax remain evenly distributed around the wick.
3. Give the first burn enough time
Watch the melt pool slowly expand. For a large jar, this may take several hours, subject to the candle’s labeled maximum burn time. If you know you can only supervise the candle for 30 minutes, save the first lighting for another day. One thoughtful first burn can make every later burn easier.
4. Keep future burns consistent
After a successful first burn, continue allowing a broad melt pool to form during later sessions. Repeatedly lighting a candle for only a few minutes can recreate a narrow channel. You do not need to obsess over millimeters of wax, but steady candle-care habits give the wick and wax the best conditions to perform as designed.
5. Keep the wax pool clean
Never leave matches, wick trimmings, dust, or other debris in liquid wax. Debris can interfere with the wick and may become a secondary ignition source. Extinguish the flame gently, wait for the wax to cool completely, and keep the candle covered between uses when a lid is available.
How Long Should You Burn a Large Jar Candle?
There is no single burn time that fits every candle. Jar width, number of wicks, wax blend, fragrance load, and room conditions all matter. The best practice is to follow the manufacturer’s instructions and look for a controlled flame and a broad melt pool.
For many large jar candles, an effective session is longer than a quick 20- or 30-minute burn. At the same time, longer is not always better: excessive burning can overheat the vessel, make the flame unstable, and create unnecessary soot. Stop at the maximum duration on the safety label, even if a small amount of wax remains near the edge. That wax may catch up during subsequent burns.
If you enjoy filling a spacious living room or open kitchen with fragrance, a larger format such as an Almond Butter Pound Cake 22 oz Mama Candle can be a natural fit. Simply schedule enough supervised time for the candle’s wider melt pool to develop.
How to Fix a Candle That Has Started Tunneling
Early tunneling is often recoverable. The safest first approach is to give the candle a full, properly supervised burn within the label’s time limit. If the remaining wax wall is still shallow, the growing melt pool may soften and incorporate it naturally.
If the wick has become buried, extinguish the candle and let it cool. Carefully remove only enough soft excess wax to expose the wick at a usable height, keeping tools and loose wax away from the flame. Do not dig against a hot glass jar, pour water into the candle, or use an oven, microwave, stovetop, or direct heat source to remelt the vessel.
You may see online advice about wrapping foil around the top of a burning candle. Because improvised covers can trap heat and change airflow, the safer choice is to follow the candle maker’s directions and avoid modifications that are not designed for that vessel. If the glass is damaged, the wick has shifted, or the flame behaves unpredictably, stop using the candle.
Does a Candle Shade or Jar Accessory Help?
A purpose-made candle shade can add decorative charm and may help shield a flame from minor room air movement, but it is not a substitute for correct burning. Use only accessories designed to fit the candle, keep ventilation openings clear, and continue following the warning label. Browse A Cheerful Giver’s Star Tin Candle Shade or pair your jar with a stable Black Candle Jar Holder for a finished display.
Common Candle-Tunneling Mistakes to Avoid
- Extinguishing the first burn too early: A narrow initial melt pool can encourage the candle to keep burning down the center.
- Cutting the wick extremely short: A weak flame may not generate enough heat to widen the melt pool.
- Burning near a fan or vent: Drafts can create an uneven flame and one-sided wax.
- Trying to fix everything in one marathon burn: Never exceed the labeled maximum burn time.
- Ignoring jar condition: Discontinue use if the vessel is cracked, chipped, or unusually hot.
- Burning to the very bottom: Stop when the label directs, typically while a safe layer of wax remains, to help prevent heat damage.
A Simple Candle-Care Routine
Before lighting, trim the wick, clear away debris, and place the jar on a level, heat-resistant surface. While it burns, keep it within sight, away from children, pets, drafts, and flammable objects. Let a broad melt pool form without exceeding the labeled burn limit. When finished, extinguish the flame completely and let the jar cool before moving, covering, or trimming it again.
These small steps take only a minute, but they protect the quality of every future burn. They also make it easier to enjoy the strong, welcoming fragrance and warm atmosphere that drew you to the candle in the first place.
Make Every Candle Burn Count
Preventing candle tunneling comes down to three habits: respect the first burn, maintain the wick, and give the candle a safe environment. Start with a broad melt pool, avoid drafts and rushed burn sessions, and always prioritize the instructions on the candle’s label.
Ready to put better candle care into practice? Explore A Cheerful Giver candles and choose a fragrance worth slowing down for. With a little patience on the first light, your new jar candle can burn more evenly and deliver more of the fragrance you love.